I came across this one and knew it was just what I had been searching for.
 So it hung out at my parents' house until last week when they brought it up to Des Moines.
It definitely has some unique components....

And it also really showed it's age....

I determined the whole piece was solid wood, so I could just strip the finish off the top and refinish the wood, as well as paint the rest.
So I smothered the top with a chemical stripper and finished bragging to my mom about how great and effective these chemical strippers are. "All you do is scrape off the stripper with a putty knife, and all the finish comes right off! It's amazing!!"

Guess those were my famous last words. Because after about an hour I came back to remove the stripper along with all the nasty stains on the top of the cabinet. Much to my surprise, nothing came off. I waited until the morning.....nothing!!
So it was time for Plan B: Sanding and scraping.

But still, after at least an hour of combined effort between my mom and me, the dark black stains where still totally noticeable.
So I faced my fear of power equipment and rented this guy from Ace Hardware:

And voila! After 15 minutes of sanding with an electric sander the top was good as new.

Then I could fiiiiinally continue with refinishing the top. So I preconditioned the wood, stained it, and finished with two coats of polyurethane.
Next up: painting. The cabinet had been painted bright green, then partially painted over with light yellow. It had to go.

In light of my recent failure with the chemical stripper, I decided to just paint over the existing paint. So after removing the hardware.....

....I did the fun part. Just paint!!

Kyle requested the cabinet be painted "Barn Door Red" (a made-up-in-his-mind color) and I had no objection. However, this color is actually "Spanish Red" from Benjamin Moore.
So after 2 coats of paint and reattaching the original hardware (which I thought about spray painting but that will have to be another day), here's what it looks like now:

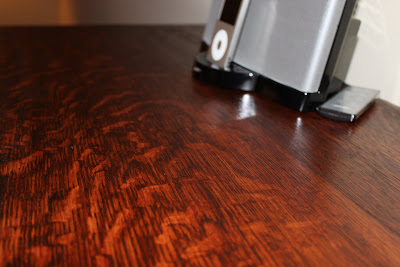
And check out the top. Muuuuuch better.

And several less-used items in our kitchen have already found homes in the new cabinet in order to clear up some valuable real estate in the kitchen cupboards and cabinets. And as you can see from the above picture, Kyle's birthday present from my parents has also claimed it's spot.

Looks great!!!! I'm gonna hire you someday when I have my own place!
ReplyDelete